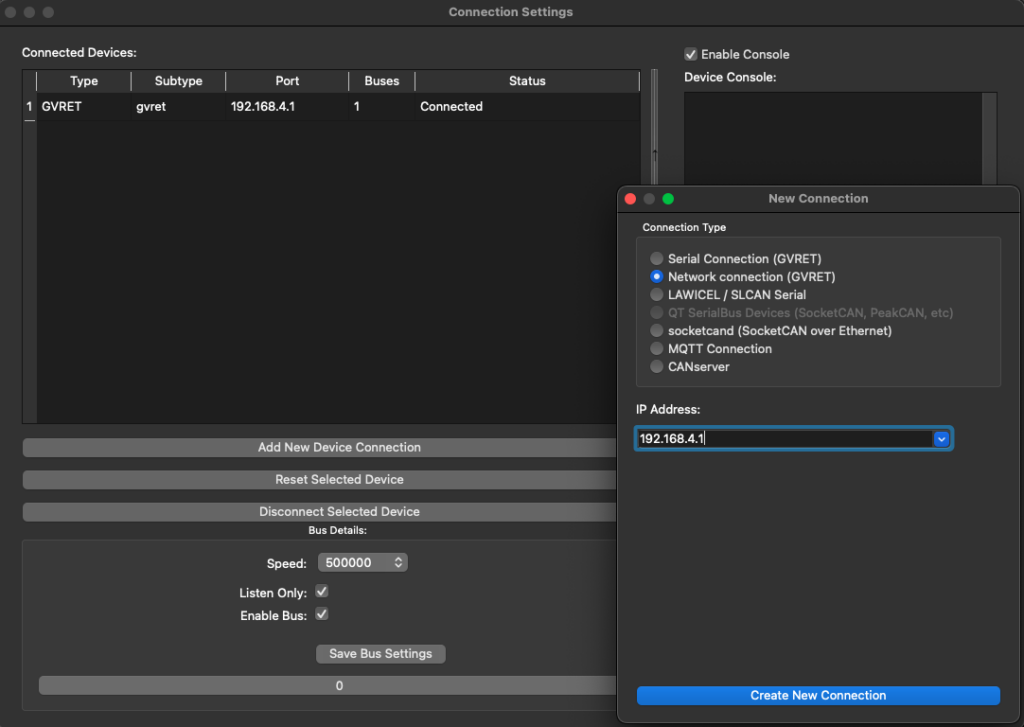
Instructions:
1) Wire the CAN device:
- Connect the WHITE wire to CAN-High
- Connect the YELLOW wire to CAN-Low
- Connect the RED wire to power source 12 Volt
- Connect the BLACK wire to the power source ground
2) Install SavvyCAN on Mac/PC
3) Power/plug the CAN device. The Red ( for power) and Blue ( for Wi-Fi Access Point) LEDs should be on
4) From the Mac/PC, connect to the Wi-Fi network called “CAN Wireless“. The password is mrdiy.ca
5) Open SavvyCAN. In the top menu, click on ‘Connections‘:
- Click on: ‘Add New Device Connection’
- Connection Type: Network connection (GVRET)
- IP Address: 192.168.4.1 (should be auto-filled)
- Click: Create New Connection
- A new entry will be added to ‘Connected Devices‘ table with Status: ‘Connected’
- You might need to adjust ‘CAN Speed‘, ‘Listen Only‘ depending on your needs and configuration


6) CAN frames should start flowing in SavvyCAN
7) Save the frames to a log file and share
Useful links:
- SavvyCAN support group: https://github.com/collin80/SavvyCAN/discussions
- SavvyCAN on YouTube – https://www.youtube.com/watch?v=HmAGsg8sdN0 (old video but worth watching)
- ESP32RET: https://github.com/collin80/ESP32RET
PS: I am not affiliated with ESP32RET or SavvyCAN.
